Sunday, 24 January 2021

Multi-Coloured Crochet Easter Egg - Pattern

Back in 2017 I worked on a collaboration with Hobbycraft.  They provided me with polystyrene eggs and yarn, and I designed these colourful crochet Easter eggs.

Free pattern for cute colourful crochet easter eggs

The patterns were on their website, but it seems they have been taken down now.  I have had a couple of requests for the patterns, so I'm publishing them here on my blog.

Use this free pattern to create cute and colourful crochet easter eggs. Multi-coloured or daisy patterned, these will look great as part of your easter decorations!

There are two designs.  This pattern is for the Multi-Coloured eggs, as shown below.  You can find the pattern for the Daisy eggs here.

Free pattern for cute colourful crochet easter eggs

There are two variations of pattern at the sides, for the penultimate round.  A filled in look shown in the yellow on the right, or a more open patterned look shown in the blue on the left.

Free pattern for cute colourful crochet easter eggs

Please note that the polystyrene eggs that Hobbycraft supplied me with were quite big.  If you use smaller eggs, then you might have to end a few rounds sooner, or perhaps use a thinner yarn and smaller hook.

You Will Need

Rico Creative Cotton Aran Yarn – white, candy pink, yellow, orange, violet, sky blue (or colours of your choice).  You can buy this yarn from Love Crafts*.

1 crochet hook – the yarn calls for 4 to 5mm so choose according to your tension

10cm polystyrene eggs


Abbreviations

ch = chain

tr = treble crochet (US double crochet)

htr = half treble crochet (US half double crochet)

dtr = double treble crochet (US treble crochet)

sl st = slip stitch

st sp = stitch space (the space between stitches)

sk = skip

st/s = stitch/es

sp = space

FO = fasten off (fasten and cut yarn, weave in ends)

SP-2 = spike stitch over two rows.  For the purposes of this pattern this is a treble (US double) which, instead of going into the row you’re working into, goes into the row below that, into the stitch space between a set of two trebles in R3.  This creates a long treble stitch.


Notes

To make the pattern simpler to follow, I have not specified the chains that count as initial stitches.  The first stitch of each round is to be made with chains:

   tr = 3ch

   htr = 2ch

Or a standing stitch:

   Wrap your yarn around your hook to create an initial loop (you can use a slip knot to secure it), then work the stitch as normal.


Make Two:

R1: Create a magic ring, 12tr into ring, sl st into 1st st, FO.  (12 tr)


R2: (New colour) [htr, ch1] into each st sp, sl st into 1st st, FO.  (12 htr between 12 ch1 sp)


R3: (New colour) [2tr, ch1] into each ch1 sp, sl st into 1st st, FO.  (12 sets of 2tr between 12 ch1 sp)


R4: (New colour) [3tr, ch1] into each ch1 sp, sl st into 1st st, FO.  (12 sets of 3tr between 12 ch1 sp)


R5: (New colour) [tr, SP-2, tr, ch1] into each ch1 sp, sl st into 1st st, FO.  (12 sets of (tr, SP-2, tr) between 12 ch1 sp)


R6: (New colour) [2tr into ch1 sp, tr into next 2 st sp] around, sl st into 1st st, FO.  (48 tr)


R7: (New colour) Start in 1st tr st from any (2tr into ch1 sp) from R6: 23tr, 4dtr, tr into remaining sts around, sl st into 1st st, FO.  (44 tr, 4 dtr)


Alternative Final Two Rounds

(Used in the egg featuring sky blue - this gives more of a patterned effect on R6, but also shows more of the polystyrene egg.  Which you try depends on your preference, or give them both a go!)


R6: (New colour) [3tr, ch1] into each ch1 sp, sl st into 1st st, FO.  (12 sets of 3tr between 12 ch1 sp)


R7: (New colour) [2tr into ch1 sp, tr into next 2 st sp] 5 times, [tr, dtr] into ch1 sp, dtr into next 2 st sp, [dtr, tr] into ch1 sp, tr into next 2 st sp, [2tr into ch1 sp, tr into next 2 st sp] around, sl st into 1st st, FO.  (44 tr 4 dtr)


Assemble

Position both halves around the polystyrene egg, ensuring the 4dtr on each half are at the pointed top of the egg.


Cut a length of yarn and sew together through the outside loop of each stitch of the final row of both halves, leaving an end long enough to create a hanging loop at the start and finish of your sewing.


Knot your ends together close to the egg to secure your stitching, then knot them at the top to create a hanging loop.


Free pattern for cute colourful crochet easter eggs

Your colourful crochet egg is complete!


Please let me know if you make any - I'd love to see them!


Free pattern for cute colourful crochet easter eggs

Use this free pattern to create cute and colourful crochet easter eggs. Multi-coloured or daisy patterned, these will look great as part of your easter decorations!

Use this free pattern to create cute and colourful crochet easter eggs. Multi-coloured or daisy patterned, these will look great as part of your easter decorations!


*affiliate link


Check out my other completed crochet items here.


Like what you see?  Follow me on bloglovin!


Sunday, 17 January 2021

Crochet Strawberry

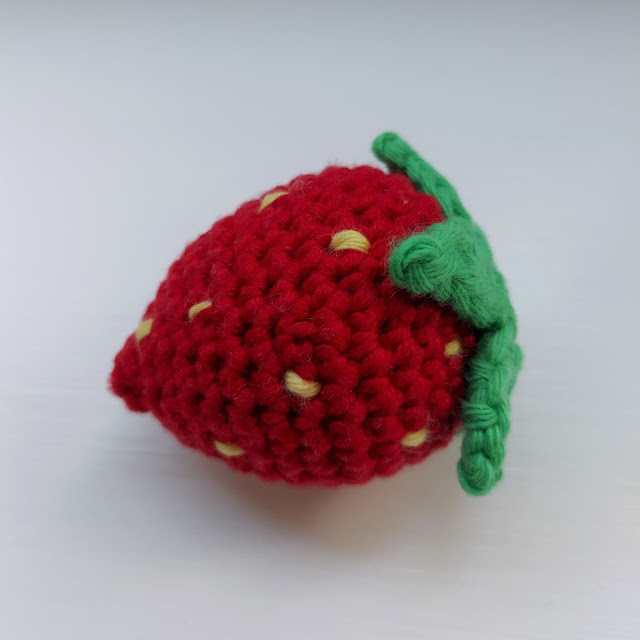
I'm attempting to finish off some projects that have been languishing for a while.  I finished a crochet strawberry for my daughter's play kitchen, that I started last Spring I think!

A cute crochet strawberry for a child's play kitchen

The pattern was from this e-book.  I think I followed it with no changes, from my recollection.  I just used oddments of cotton yarn I have in stash.

A cute crochet strawberry for a child's play kitchen

She now has two items of crochet food (to go along with a lot of plastic food she seems to have acquired!) - I need to crochet more as they're much nicer than the plastic stuff...

A cute crochet strawberry for a child's play kitchen

I posted about the crochet carrot here.  I'm thinking of making a cute basket for them too... one day...


Check out my completed crochet items here.


Like what you see?  Follow me on bloglovin!


Saturday, 9 January 2021

Natica Cowl - Work in Progress

Last February, I went to Unravel festival with a couple of friends.  It was my first day out since having Emily in May 2019... and my last day out!  I was away from her for a grand total of 6 hours, the longest I've not been with her all her life!  Then Covid struck.

At Unravel, I came across the stand of Irish Artisan Yarn - and the softest most luxurious yarn!  I didn't buy any there, but later put an order in with some great help from Tara - who assisted me in picking the perfect colours to make a Natica Cowl.

IAY Irish Artisan Baby Alpaca Silk yarn

These are on the baby alpaca and silk base, in colours Skerries (the greeny) and Donegal (the lilacy).

Here they are, caked up and with the cowl started...

Natica Cowl WIP made with IAY Irish Artisan Baby Alpaca Silk yarn

Such pretty colours together!

Natica Cowl WIP made with IAY Irish Artisan Baby Alpaca Silk yarn

You alternate striped sections...

Natica Cowl WIP made with IAY Irish Artisan Baby Alpaca Silk yarn

and fancy stitch pattern sections...

Natica Cowl WIP made with IAY Irish Artisan Baby Alpaca Silk yarn

I haven't made much progress with this in a while, as my craft-mojo is lacking a bit.  I really need to get a move on, as the yarn is so very soft and I love the colours - it's going to be such a soft, cosy and pretty cowl when it's finished!

Hope to be back soon with some finished makes!


Sunday, 3 January 2021

Creation Consolidation - 2020!

I like to round up my creations for each year - so here we go with 2020.  I did not have a very creative year at all.  I really need to up my game!  The last two years have been a bit sparse, since I had my daughter in 2019.  It's hard to find the time and energy - and this year has naturally been difficult with the Covid pandemic.

Anyway - let's see what I did manage to make!  Click the headings or pictures to be taken to the blog posts for more information.

Paper Flower Wall Hanging

Knitted Peach

Drawstring Bag

Stevie Top

Candles

Yarn Hoop Wall Hanging

Fimo Bead Keyring

Snuggle Down Cowl

Crochet Carrot

Felt Christmas Pudding Decoration

Grey Crochet Baby Blanket


It's still more than I thought, to be honest.  I think I say this every year and that's why I like rounding up my makes in one place!

If you are interested, here are my consolidation posts from previous years:

I didn't do a round-up for years before that, but you can see other finished items at the below links:


I hope that 2021 is a more positive year for us all.


Thursday, 31 December 2020

Grey Crochet Baby Blanket

A quick post at the end of the year, just to show this baby blanket I made at the beginning of the year.  This was before Covid, and before returning to work after my maternity leave, juggling work and child-care.  My creativity has been hold a fair bit!

Crochet baby blanket

This was made for a very special little boy, the son of a friend.

Crochet baby blanket

I couldn't find a surface that wasn't grey with enough light to take a picture - so excuse these images.

Details

Pattern: Peek-a-Boo Blanket by Sandra Paul - Size: Small Baby Blanket
Yarn:
  Main colour: Sirdar Snuggly in Cloud (487) x 5 balls
  Border: Sirdar Sunggly in Sky Blue (216) x 1 ball
              Sirdar Snuggly in Pastel Blue (321) x 1 ball 
Hook: 5mm (I'm a tight crocheter - pattern calls for 4mm)


Check out my completed crochet items here.


Like what you see?  Follow me on bloglovin!


Tuesday, 29 December 2020

Felt Pastel Christmas Pudding Decoration

 I started a tradition in 2018 of making a felt Christmas tree decoration each year.  This year's got finished on Christmas Eve Eve!

Felt pastel Christmas Pudding decoration

I really couldn't get inspired at all this year, but kept coming back to the idea of a Christmas pudding.  However, I didn't fancy the dark brown of the pudding, so decided to make a pastel version.  I'm really pleased with how it turned out!

Felt pastel Christmas Pudding decoration

As per tradition, I embroidered the year on the back - probably my least favourite part!

Felt Christmas tree decorations

Above you can see the star from 2018 and the Emily mouse from 2019 (the year she was born).

I hope you managed to enjoy the Christmas festivities, if you celebrate!


Monday, 7 December 2020

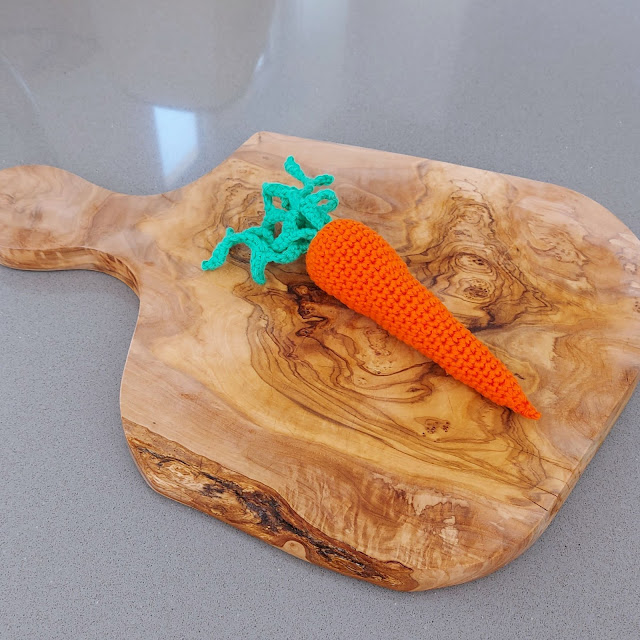
Crochet Carrot

My daughter received a play kitchen for her first birthday (back in May) which she loves playing with.  I decided to crochet her a selection of fruit and vegetables to go with it...

Make a cute and easy crochet carrot, play food for your child!

Well, I've only completed a carrot so far, I'm afraid to say!  She does have a tub of plastic food to be getting on with, but I do hope to make more crocheted items at some point.  I've been finding it very hard to be creative in recent months, so output has slowed a lot!

Make a cute and easy crochet carrot, play food for your child!

The pattern was from this e-book and I was inspired by Gillian of Tales from a Happy House who made crochet food years ago, before Emily was even a twinkle in my eye, and I kept it in mind ever since!

I made a few tweaks to the pattern as I went along, but I have no idea what they were now as I made this months ago!  It's taken a while to make it's way onto the blog!

Make a cute and easy crochet carrot, play food for your child!

I've got a strawberry on the go, so maybe I'll finish it one day!


Check out my completed crochet items here.


Like what you see?  Follow me on bloglovin!


Sunday, 6 September 2020

Snuggle Down Cowl

I've been very remiss with my crafting and blog posting lately!  I finished this knitted cowl at the end of June, and it's taken me this long to show it here.


It is the Snuggle Down Cowl by the lovely Jooles of Sew Sweet Violet.

I love this pattern - it is so simple and yet so effective, and very enjoyable to work on.


I used some 100% silk DK yarn by Willow Knits in colour Jade that I bought from Unravel in February, for only £10!

I used 40cm circular needles in size 5mm.

I do plan to make this pattern again, using the suggested method of holding fingering weight yarn along with some soft floof - suri alpaca yarn.  I've got the below minis and floof just waiting!


I can't wait to see how it looks knitted up!  It's in the queue, though, as I'm working on yet another cowl at the moment!  (How many cowls does one person need??)


Check out my completed knitted projects here.


Like what you see?  Follow me on bloglovin!


Wednesday, 24 June 2020

Fimo Bead Keyring with Tassel

I requested FIMO for Christmas in 2017... it's taken me until now to actually make something with it!  This is the first time I've used FIMO since I was a kid!

I just had the sudden desire to make some beads and turn them into a little keyring / bag charm kind of thing!  One of those pretty but pointless items really...


Cute fimo bead keyring with tassel

I used pink and white FIMO to make the plain beads, then mixed some of both to make the marbled bead.  I already had some lobster clasps in my craft room, and some leftover Kingcole Cottonsoft yarn in just the right shade of pink for the tassel!

This brings me immense pleasure - I'm not sure quite why!  I just love it.

Next time I use FIMO I'm going to have to be more careful about dust, as I ended up working some dust into the FIMO and struggled to get rid of it.  But for a quick project, whipped up on a whim, I'm happy!


Like what you see?  Follow me on bloglovin!


Monday, 22 June 2020

Yarn Hoop Wall Hanging

I mentioned in the post, My Current WIPs, back in January, that I wanted to finish this wall hanging...

Colourful yarn hoop wall hanging for a baby's nursery

Which, as you can see, I have!  It doesn't look much different from the picture in my WIP post.  In the end I just wetted the yarn to straighten it out.  I left everything else the same.

It is made by attaching two hoops together with yarn, which you can see at the top, incorporating a hanging loop.

I then strung some old beads I had between the two hoops and added a fringe of yarn to the bigger hoop.

Here it is, hanging in Emily's bedroom...

Colourful yarn hoop wall hanging for a baby's nursery

It is made using leftovers from Emily's heart blanket I made for her before she was born.

The idea for this hanging came from my friend Kimberly of Swoon Worthy Blog - she made this sophisticated version which I copied in a less classy fashion!


Like what you see?  Follow me on bloglovin!


Tuesday, 19 May 2020

Handmade Candles

For Christmas 2018, my husband bought me a candle making kit.  I made a couple of candles during the Christmas break... and it's taken me nearly a year and a half to finish them off and show them here!

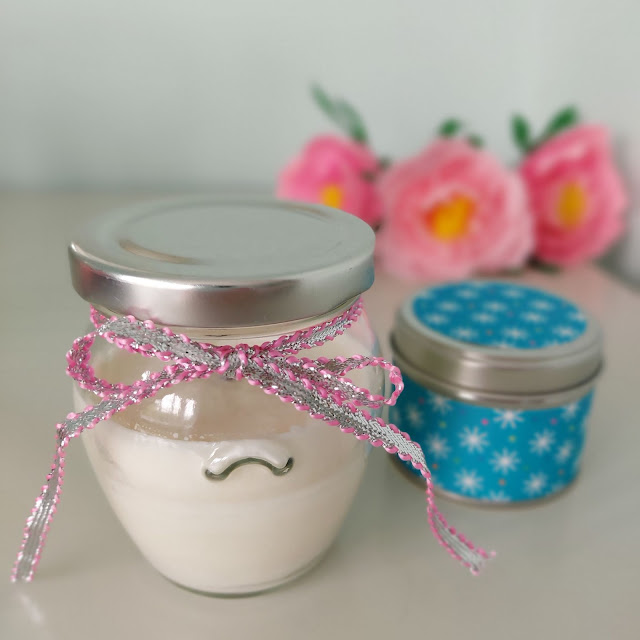
Simple handmade candles

One is in a tin and one in a jar, and I wanted to add a bit of decoration to the tin and a ribbon to the jar.  This took me a matter of minutes the other day, so here they are!

The jar has been used a bit, hence the wax being a bit low.  Also, I overfilled the tin - the wick was getting a bit crushed when the lid was on.  I've since burnt it down a bit, so it's all good now!

I just used some card making decorative paper to cover the tin.  It is very simple, but pleases me!

They are scented with jasmin, which came as part of the kit.  It's not my favourite scent, so I'm thinking of buying some more fragrances to use for the next candles I make (whenever that may be!).  I do like a sweet smell, or something spicy for winter.

Simple handmade candles

So, there you have it - something a bit different from my usual creations!

I hope you are all surviving lockdown, and are well and safe.


Like what you see?  Follow me on bloglovin!


Related Posts Plugin for WordPress, Blogger...