Friday 24 December 2021

Felt Penguin Christmas Tree Decoration

If you've been following for a while, you will have seen that I started a tradition in 2018 of making a felt Christmas tree decoration each year.

This year I made a cute little penguin, with Max's name on it, to celebrate that this is the year he was born!

Felt Penguin Christmas Decoration

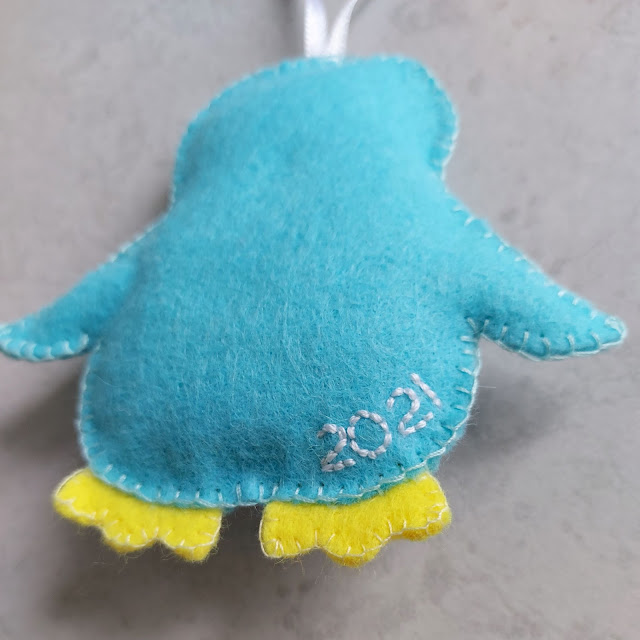
Each year I embroider the year on the back...

Felt Penguin Christmas Decoration

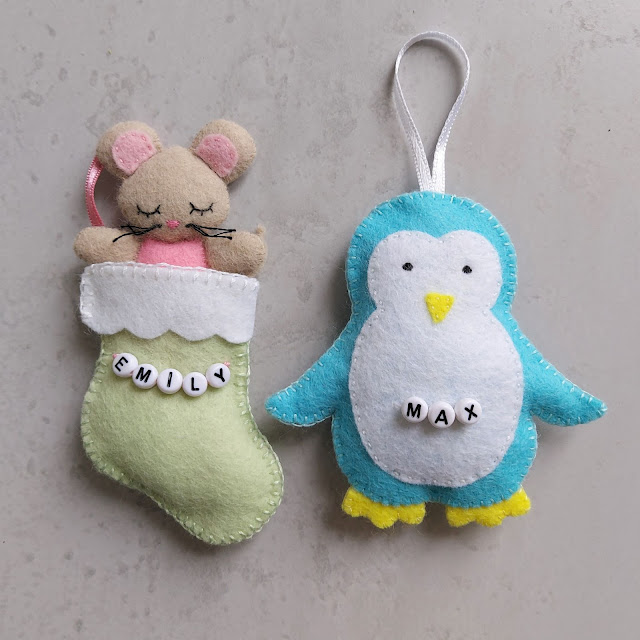
I made a special decoration in 2019 too, the year Emily was born - here they are together...

Felt Penguin and Stocking Christmas Decoration

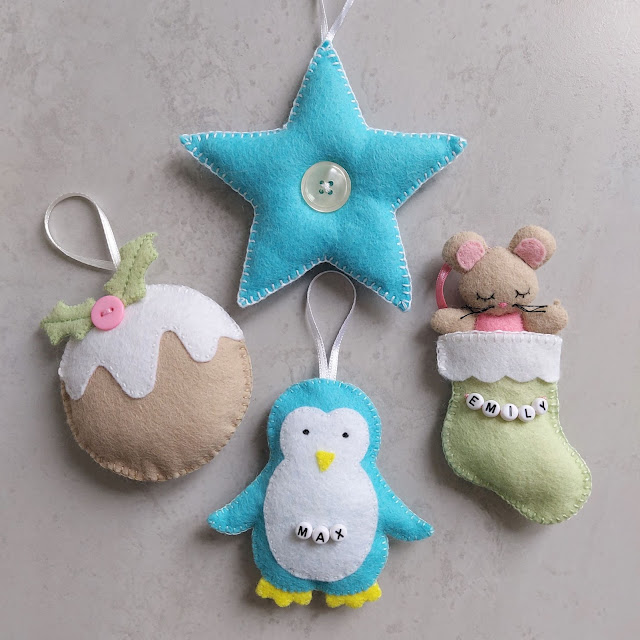
And below are all four I've made...

Felt Christmas Decorations

You can see my posts on them as follows... 2018 Star, 2019 Mouse in Stocking, 2020 Pudding.

The collection is growing!

I hope you have a merry Christmas and a healthy and happy New Year!

I'm hoping to have more chance to create and craft next year.  If we can get Max sleeping at a reasonable hour in the evenings, then I'll have an hour or two then to work on things... trusting I'm not too exhausted!


Thursday 23 December 2021

Cricut Art Book

Emily loves playing with stickers, and Santa is putting some in her stocking this year!  I thought a little notebook that she could use to stick the stickers in, and for drawing with her crayons, would be a nice idea.

Cricut Art Book

I bought a kraft notebook from Amazon and decorated it with shimmer permanent vinyl cut on my Cricut Joy.  Very quick and simple, but hopefully she'll like it.  She can't read yet, but she knows a lot of her letters and hopefully will learn to recognise her name!

A cute little personalised Christmas present for under the tree!


Tuesday 21 December 2021

A New Arrival

Well, it's been a while!!  As the subject of this post suggests, there has been a new arrival!  Not so new anymore...

Max was born back in June!  Here he is looking festive in a Christmas jumper and hat my Mum knitted for him!

And here he is with his big sister, Emily, also in a Grandma creation...


Having these two doesn't leave much time for crafting I'm afraid!  I do have a couple of things to show you though, so will aim to get those posts in before the end of the year!


Wednesday 9 June 2021

Blue Knitted Baby Hat

Not long to go until the baby is here, all being well!  I have knitted him a little blue hat to wear in hospital...

Cute knitted baby hat with topknot

The pattern I used was the Tegan Baby Hat that you can find here.  It is the same pattern I used for my daughter's hat two years ago.

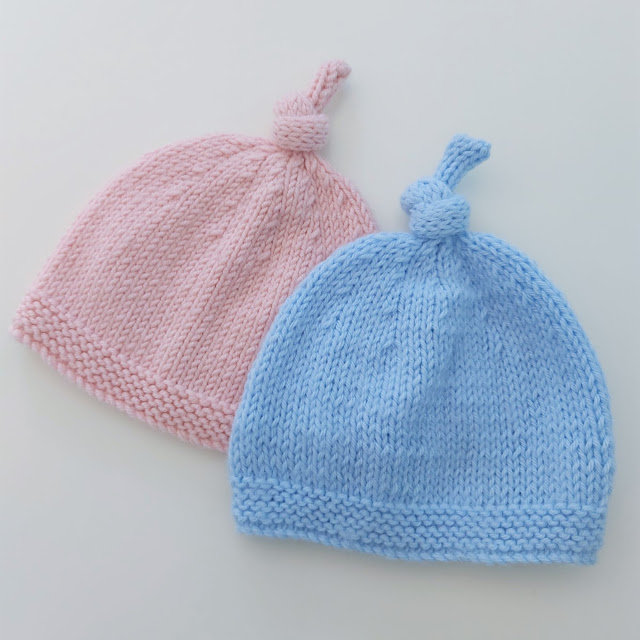
Here they are together...

Cute knitted baby hat with topknot

THE DETAILS

Yarn:  Sirdar Snuggly DK in Sky Blue (216)

Needles:  3.5mm for the garter edge, 4.5mm for the rest.  This is bigger than the needle size called for, but I have a tight tension and was also knitting the preemie size so wanted it to come out a little bigger, but not as big as the 0 - 3 months size.

Pattern:  Preemie size, knit flat instructions from here.


Check out my completed knitted projects here.


Like what you see?  Follow me on bloglovin!

Monday 26 April 2021

What to do if your Cricut Joy Cards are Cutting too High

This isn't my usual "look what I made!" blog post... but I'm sharing it as I experienced this problem and I couldn't find anything online about it!

When I first got my Cricut Joy, I also got some Insert Cards and a Card Mat.  However, when attempting to make a card, I found that the whole design wasn't cutting centrally on the mat, it was cutting too high, and therefore the corner slits were cutting off the card!  One, this didn't look right; and two, it didn't function correctly - the top slits were unable to hold the insert rectangle of card.  You can see two examples below...

Cricut Joy Faulty Card Mat

You can also see on the Card Mat below, which still has the leftovers from the 'Thanks' card, that it is too high on the mat, and the top of the corner slits are being cut into the mat rather than the card...

Cricut Joy Faulty Card Mat

After searching high and low on the internet for some kind of solution to my problem - what was I doing wrong?! - I called the Cricut helpdesk.  They were so helpful, and after us trying a few different things while on the phone, it turned out...

...the Card Mat was faulty!!

This is something I didn't even consider!  The border at the top of the Card Mat was actually too big, so when the card was positioned correctly on the mat, it was actually lower than the Cricut Joy machine expected it to be.  The machine cut as it should, but because the card was lower down, it was cutting the design too high, and off the top of the card.

The Cricut helpdesk arranged for a new mat to be sent to me, and all was well with the world!

You can see the difference in the top border sizes below... the correct one is on top.

Cricut Joy Faulty Card Mat

The new mat made all the difference, and I could now make the cards correctly!

Cricut Joy Card

Cricut Joy Card

I hope this helps anyone who experiences the same problem - as there must be a load of these faulty card mats out there!


Sunday 11 April 2021

Baby Boy V-Stitch Crochet Blanket

 I have finished the crochet blanket for my little boy bump!

A cute stripy crochet v-stitch baby boy blanket

This picture shows it in my little daughter's pink bedroom, as the nursery is yet to be painted for the new baby, and the cot is on order!  The baby's room will probably be bluey/aqua colours with accents of orange.

The yarn I've used is King Cole Cottonsoft DK in the below colours:

Azure (3366)
Opal (3460)
French Navy (741)
Orange (3030)
White (710) - not shown

You can buy this yarn from Love Crafts*.

A cute stripy crochet v-stitch baby boy blanket

I used this blanket as my starting point.  I started and ended with colour sections, though, rather than white sections, and I chose a different border.

  • I started with a chainless sc (US) foundation row of 149 stitches, plus 3 ch.  I would recommend doing a chain in this case, though, which would be 149 stitches, plus 3 = 152 ch.
  • I did four repeats of four colours (with white inbetween).  I have tight tension though, and for me the blanket was a bit thin.  So someone else might get away with three repeats.  Or else do more chains to make a wider blanket.  (Your starting chain must be a number that is divisible by 3, then plus 5.  For example, 152 ch is 49 x 3 = 147.  147 + 5 = 152.)
  • Each coloured band was 4 rows of v-stitch.
  • Each white band was 2 rows of v-stitch.
  • When finished, I went around the blanket with single crochet (US) / double crochet (UK) in white.  I did 2 stitches over the last stitch in each row of v-stitch down the sides.  Across the top and bottom, when I got to a v space, I did a long sc (US) / dc (UK) into it, to slightly mimic the zigzag of the v-stitch.
  • I did a row of sc, skip 2 st, ch 2.  I then did a row of sc, before continuing the border in linen stitch in white, ending with a single linen stitch row in orange.  You could probably just go straight into linen stitch after your initial foundation row of sc/dc, though.  (I was a bit undecided on what I was doing at first!)

A cute stripy crochet v-stitch baby boy blanket

I'm really pleased with how it came out, and how the colours look together!

A cute stripy crochet v-stitch baby boy blanket

The blanket measures approximately 78cm x 103cm. 

A cute stripy crochet v-stitch baby boy blanket

If the blanket looks a bit rumpled in the last two pictures, it's because a certain little toddler decided to play on it during the photoshoot!  At least it has her seal of approval - hopefully her brother will feel the same!

A cute stripy crochet v-stitch baby boy blanket


What do you think?  I hope you like it!


*affiliate link

Check out my completed crochet items here.

Like what you see?  Follow me on bloglovin!

Sunday 4 April 2021

Happy Easter!

 Just popping in quickly to say Happy Easter!

Colourful crochet and felt eggs on a pretty white Easter tree

Emily and I decorated this tree with eggs I'd made in previous years.

The very old felt eggs can be found on my blog here - in a post from nearly exactly 10 years ago!

Patterns for the crochet eggs can be found here and here.

Have a lovely time and eat lots of chocolatey goodies!


Friday 2 April 2021

Crochet Easter Bunnies

 I decided to make some little crochet bunnies for Emily to find during her Easter hunt this weekend.

Crochet these cute and easy Easter bunnies

The pattern I used was this one from The Knotted Nest.  I used DK scraps of King Cole Cottonsoft I had in stash, and a 4mm crochet hook.  (You can buy this yarn at Love Crafts *.)

Crochet these cute and easy Easter bunnies

You make a front and back, add a little tail, then crochet together with a bit of light stuffing inside.

Crochet these cute and easy Easter bunnies

The pattern calls for a pompom tail, but I couldn't make one that didn't look too big, despite all the trimming I did.  (I used a thinner yarn than the pattern suggested, and I am a tight crocheter too, so my bunnies came out smaller).

So instead I made the tail from this pattern by Love the Bluebird.  I used 2 strands of DK King Cole Cottonsoft in White, and a 5mm crochet hook.

I was going to make a lilac bunny too, but I lost interest after two!  I'm sure two are enough, though, and I hope Emily likes them!


*affiliate link

Check out my completed crochet items here.

Like what you see?  Follow me on bloglovin!

Sunday 28 March 2021

Cute Easter Buckets with the Cricut Joy

I have been getting a fair bit of use out of my Cricut Joy - considering I have limited time to concentrate and learn what to do!

I'm quite excited by my latest project - some mini Easter Buckets for Emily to use for a little Easter egg hunt next weekend.

Make these cute and easy Easter buckets with the Cricut Joy!

Everything I've been doing so far has been with the things you can get free in Cricut Design Space (or fonts I've uploaded) but I decided to go for the free month trial of Cricut Access, and it has been good to not have to limit myself to the free things.  (To be honest, maybe some of what I've used here is free - I'm not sure now that I have access to it all.)

The bunny design I used without any changes, as I knew I wanted a simple white silhouette, and I love how it looks!  That was my original idea - a white bunny silhouette - but then I thought carrots would be cute too.  I found a simple carrot image, but it was also designed to be cut in one colour.  However, I fiddled about with the image to separate the leaves from the carrot so that I could cut them in two colours.  I'm so pleased with how they came out!

Carrot Image: #M7866023 (that one might be free) - tangerine and mint permanent vinyl (from the Beachside pack)
Bunny Image:
#M248BFFB9 - whie permanent vinyl

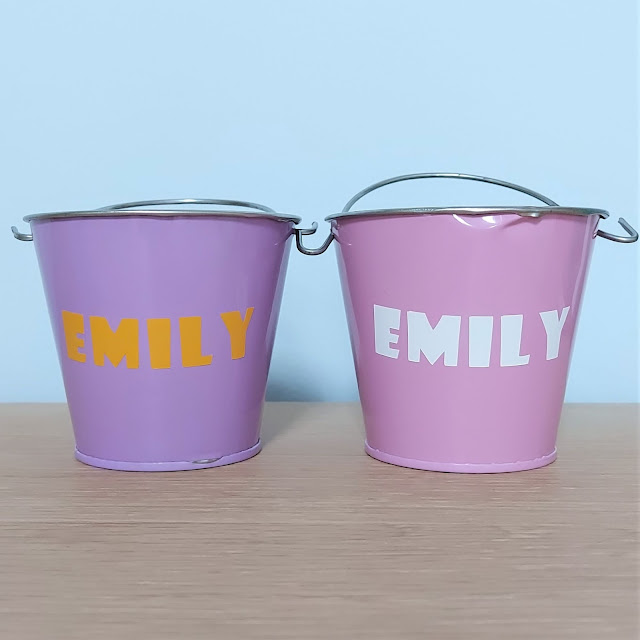
The back of the buckets have Emily's name on:

Make these cute and easy Easter buckets with the Cricut Joy!

(My camera really didn't like focussing on that orange!)  The font I used was Showcard Gothic.

The pastel buckets are from Baker Ross.  They are tiny 7.5cm high buckets, in a pack of 5.  Quite overpriced, once you pay for delivery, but they were just what I wanted.  And I hope that we'll use them for years to come.  (The dent on the back of the pink one annoys me greatly, though.  I may have to stick some trim on to cover it.)

Make these cute and easy Easter buckets with the Cricut Joy!

These are hollow chocolate eggs - creme egg sized - so you can see how small the buckets are!  My husband bought the eggs when he did the food shop.  I wanted smaller eggs, but the colourful foil wrappers are just what I had in mind!

I also made a couple that will be for the little baby on his way... if all goes to plan.

Make these cute and easy Easter buckets with the Cricut Joy!

Once he's safely in this world and we're sure of a name, I will put his name on the back of these buckets.

With the extra yellowy bucket, I did a simple 'Happy Easter' design.  Here they all are together!

Make these cute and easy Easter buckets with the Cricut Joy!

What do you think?  I'm so pleased - they came out just as I had imagined!


Saturday 20 March 2021

Craft Organising with the Cricut Joy

The tidying and organising of my craftroom is a very slow ongoing project.  I never seem to get enough time to work on it.  When I try with Emily, she ends up tipping ribbons and buttons all over the floor!  They are some of her favourite things to play with, so I don't mind... I just don't get much tidying done!

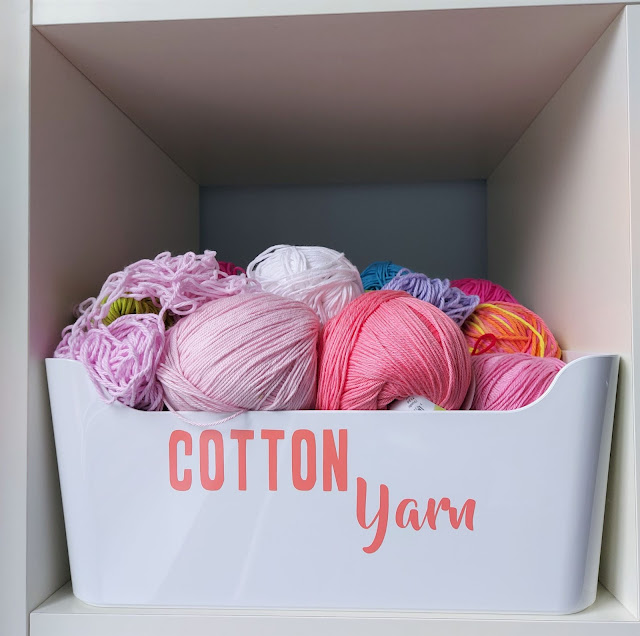
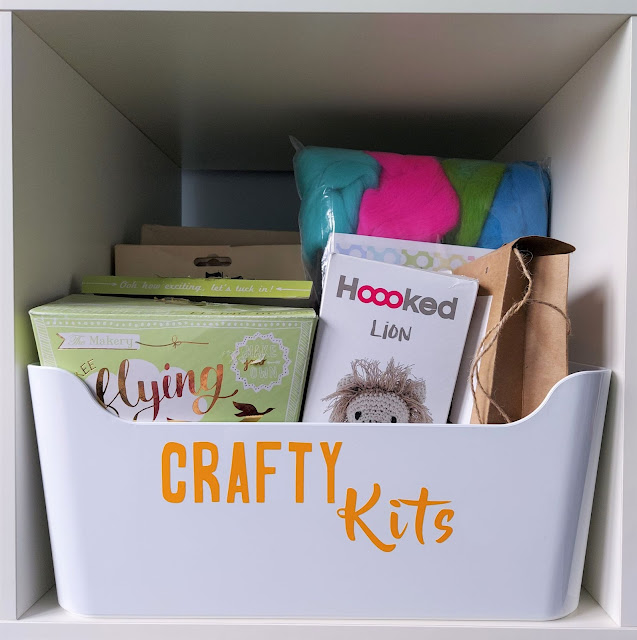
I have started organising a few thing into Ikea Variera tubs, though.  I've got a couple of tubs completed and I used my Cricut Joy to give them some fancy labels!

Organise your craft stash using the Cricut Joy to make pretty labels for storage tubs

I can't tell you how much pleasure this brings me!

Organise your craft stash using the Cricut Joy to make pretty labels for storage tubs

The fonts I used were the Cricut font, A Frightful Affair, for the first word, and a font I downloaded called Beyond the Mountains for the second word.  For the second word, I detached the letters and brought them a bit closer to each other.

I used Permanent Smart Vinyl from a pack called Beachside.  One is in the coral colourway, and one in tangerine.  I plan other colours for further boxes I will be labelling.  Hopefully at some point I can bring you some pictures of a fully tidy and organised craftroom!  But, for now, it's a start...!


Sunday 14 March 2021

Baby Boy Blanket Beginnings

 I am yet to share my exciting news here on my blog... so here it is!

See the start of a zingy crochet V-Stitch Baby Blanket

We're expecting our second child - a little boy due end of June / beginning of July!

I have naturally started work on a crochet blanket for the little one!  You can see the colours above - although the blue and aqua look quite similar in that image.  The next picture shows their colours better...

See the start of a zingy crochet V-Stitch Baby Blanket

The yarn I've used is King Cole Cottonsoft DK in the below colours:

Azure (3366)
Opal (3460)
French Navy (741)
Orange (3030)
White (710) - not shown

You can buy this yarn from Love Crafts*.

I decided to go for a v-stitch pattern... although I was a bit uncertain whether I'd made the right choice or not after I first started.

See the start of a zingy crochet V-Stitch Baby Blanket

I carried on to see all the colours in play, though, and decided I did like it!

See the start of a zingy crochet V-Stitch Baby Blanket

I really love the orange and opal (aqua/turqouise).

So far, so good!  I will be back at some point to share the finished blanket I hope!


*affiliate link

Check out my completed crochet items here.

Like what you see?  Follow me on bloglovin!

Saturday 6 March 2021

Crochet Pineapple Pattern

Back in 2017 I made this cute little pineapple.  I've had a few requests for the pattern... so will be bringing it to you today!

Make this cute and easy crochet pineapple with this FREE pattern!

I made up my own pattern, inspired by a lot of the crochet pineapple images on Pinterest.

Terms are in US (even though I'm from the UK!).  To convert this to UK, replace all dc stitches with tr.

Use a yellow yarn and a green yarn, and a hook size appropriate for your yarn and to keep the crochet nice and tight for stuffing.  I used Rico Creative Cotton Aran yarn that I had in stash.  You can buy this yarn from Love Crafts*.

YELLOW PINEAPPLE:

  • Magic ring
  • ch2 (counts as first dc), 11dc, join with sl st to ch2 (12 dc)
  • ch2 (counts as half of first dc2tog), dc into same st (to complete first dc2tog), dc2tog into each st, join with sl st to first dc (after the ch2) (12 dc2tog clusters)
  • ch2 (counts as first part of first dc3tog) dc2tog into same st (to complete first dc3tog), dc3tog into each st, join with sl st to dc2tog (12 dc3tog clusters)
  • ch2 (counts as first part of first dc3tog) dc2tog into same st (to complete first dc3tog), dc3tog into each st, join with sl st to dc2tog (12 dc3tog clusters)
  • ch2 (counts as first part of first dc3tog) dc2tog into same st (to complete first dc3tog), dc3tog into each st, join with sl st to dc2tog (12 dc3tog clusters)
  • Stuff the pineapple.
  • ch2 (counts as half of first dc2tog), dc into next st (to complete first dc2tog across 2 sts), dc2tog across 2sts around, join witih sl st to first dc (6 st)
  • Cut yarn


GREEN LEAVES:

(When I slip stitched into the yellow stitches to create the leaves, I did this by working my hook from the inside of the pineapple to the outside.  Rather than working as if I was continuing the rounds of the pineapple, by working my hook from the outside of the pineapple to the inside.  I’m sure the leaves would look fine either way – it just meant that the top of the leaves were the right side, although they stick up on the air anyway.)

  • Join green yarn with a sl st to any of the 6 sts in the last round of the yellow, ch7, sl st into 2nd ch from hook and into all stitches down
  • sl st into next st, ch7, sl st into 2nd ch from hook and into all stitches down
  • sl st into next st, ch7, sl st into 2nd ch from hook and into all stitches down
  • sl st into next st, ch7, sl st into 2nd ch from hook and into all stitches down
  • sl st into next st, ch7, sl st into 2nd ch from hook and into all stitches down
  • sl st into next st, ch7, sl st into 2nd ch from hook and into all stitches down
  • sl st into first st again (you will be going around the 6 stitches again to create another layer of leaves), ch7, sl st into 2nd ch from hook and into all stitches down
  • sl st into next st, ch7, sl st into 2nd ch from hook and into all stitches down
  • sl st into next st, ch7, sl st into 2nd ch from hook and into all stitches down
  • sl st into next st, ch7, sl st into 2nd ch from hook and into all stitches down
  • sl st into next st, ch7, sl st into 2nd ch from hook and into all stitches down
  • sl st into next st, ch7, sl st into 2nd ch from hook and into all stitches down
  • sl st somewhere to finish and cut yarn

This should give you 12 leaves, two layers of 6, but they should all wriggle about into a nice cluster of leafiness!


Sew ends in the best way to neaten the top and create a loop if you'd like one.  Your pineapple is made!


Make this cute and easy crochet pineapple with this FREE pattern!

Do let me know if you make one of these - I'd love to see your creations!

Make this cute and easy crochet pineapple with this FREE pattern!

*affiliate link


Check out my other crochet items here.


Like what you see?  Follow me on bloglovin!


Sunday 28 February 2021

Making Memory Tags with the Cricut Joy

My main birthday present in December was an excitedly anticipated Cricut Joy.  I have been enjoying using it, in the spare moments I get.  It's difficult to find the time to really get stuck in, with an energetic toddler around, but I'm learning bits here and there!

You know when you have so many things that need to be done around the house... but you get some time to yourself and a (pretty unnecessary) task such as making memory labels somehow whizzes to the top of the priority list?!  That's what happened here...

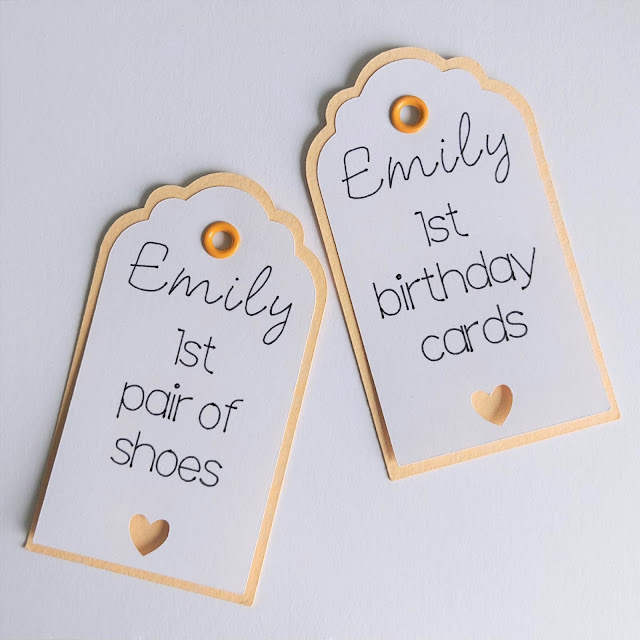
Make beautiful memory tags with your Cricut Joy

I started with a free tag shape in Cricut Design Space.  I added text to that to have my daughter's name at the top, then the item I was tagging below that.  The font I used for her name was P.S.  The font I used for the description was Quinn Type.  These are both free writing fonts within Design Space.  When you make the tags, the Cricut Joy uses the pen to write the text, then you swap to a blade to cut the tag out.

I also added a small heart shape and used the slice tool to remove it from the tag, so that it would leave a heart shape hole when cut out.  I cut this out from ordinary white cardstock, using a Cricut Standard Grip mat.

Make beautiful memory tags with your Cricut Joy

This is how the first layer of the tag came out.  I then used the same free tag shape and made it slightly bigger so that it could sit behind this and would be seen around the edges and through the heart cut-out in the top layer.  The second layer had no writing or heart cut-out, just the hole at the top, which needs to be in the same place as for the first layer.  I cut that out of some coloured cardstock I had, using a Cricut Standard Grip mat.

Make beautiful memory tags with your Cricut Joy

I joined the two layers via the hole at the top, using a mini eyelet setter and an eyelet that matched the colour of the card I used for the second layer.  I then threaded some bakers twine through the hole to attach the tags to items.

Make beautiful memory tags with your Cricut Joy

These could now be popped, nicely organised, into a memory box for my daughter!

I found this an immensely satisfying little project!  I have the tags saved to be amended to use for other items in the future.  This should help in keeping organised!

I hope you enjoyed this design, and I aim to bring more Cricut Joy creations to you in the future - it's great for organisational projects!


Friday 19 February 2021

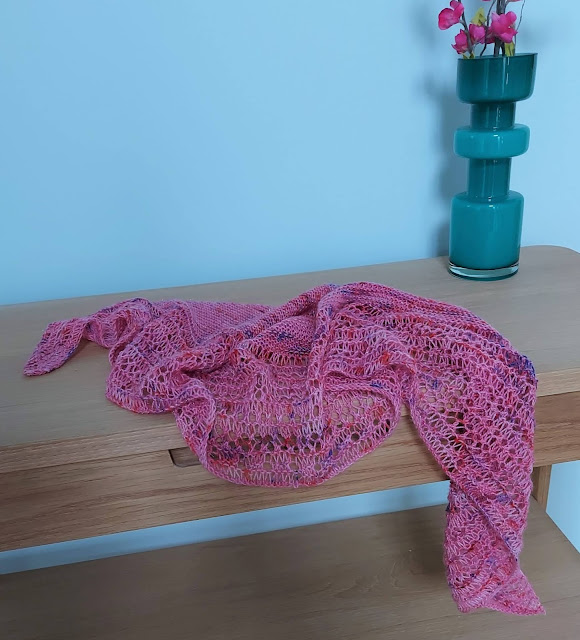
Knitted Rosewater Shawl

 I finished knitting this shawl in August 2018... it has taken me this long to block it!

Rosewater Shawl knitted in beautiful hand-dyed yarn

I used Lazadas Blocking Wires and some T-Pins to block it.  A bit fiddley but with a good result.  I think this is the set I ordered, but the packaging seems to have changed in the subsequent years!

Rosewater Shawl knitted in beautiful hand-dyed yarn

It's quite difficult to photograph in the dingy light at this time of year... but hopefully these pictures give some idea...

Rosewater Shawl knitted in beautiful hand-dyed yarn

The pattern is the Rosewater Shawl by Janina Kallio.  I used the recommended needle size, but should have gone up needle sizes, as I am a tight knitter.  I'm not sure how I ommitted to do this!

Rosewater Shawl knitted in beautiful hand-dyed yarn

The shawl is therefore smaller than it should be, but I'm happy about that as it fits around my neck quite neatly.  I sometimes find lots of excess shawl a bit annoying, flapping about!

Rosewater Shawl knitted in beautiful hand-dyed yarn

The light is best in this last photograph, and you can see the lovely colour of the yarn.  It was a hand-dyed skein of yarn from Dandelion and Dogwood - back when they were The Little Tailoress - called Jam Tart.  It actually sparkles, but I haven't been able to capture that on camera.

I'm glad to get another WIP finally finished!


Check out my completed knitted projects here.


Like what you see?  Follow me on bloglovin!

Friday 12 February 2021

Watercolour Valentine's Hearts - Kids' Crafts

I don't go in for Valentine's decorating usually, but I thought it would be nice to do some Valentine's crafting with my daughter, who is coming up for 21 months old.  Anything to provide some entertainment during these lockdown days!

Make easy watercolour hearts with your children as Valentine's crafting.  You can use them as hanging decorations on a Valentine's tree.

First I gave her some pink, purple and red watercolour paints to use on an A4 piece of plain white card.  I had to fill in the gaps, as she was more interested in painting with just the water than the paints!  We covered both sides of the card and left it to dry.

Make easy watercolour hearts with your children as Valentine's crafting.  You can use them as hanging decorations on a Valentine's tree.

I then cut the A4 sheet into 3 sections that would fit into my Cricut Joy and used it to cut out hearts.  You could easily do this by hand, though.

Make easy watercolour hearts with your children as Valentine's crafting.  You can use them as hanging decorations on a Valentine's tree.

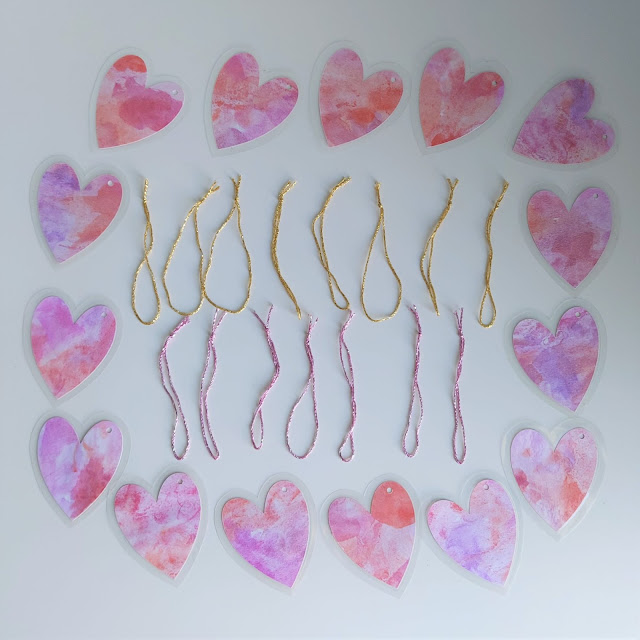
To make them more durable when being manhandled by a toddler, I then laminated them...

Make easy watercolour hearts with your children as Valentine's crafting.  You can use them as hanging decorations on a Valentine's tree.

I punched small holes in each one and prepared some sparkly gold and pink yarn into hanging loops...

Make easy watercolour hearts with your children as Valentine's crafting.  You can use them as hanging decorations on a Valentine's tree.

The sparkly yarn I used was Anchor Artise Metallic* - I have this in quite a few colours!  It's especially good for Christmas crafting!

Then my daughter got involved again... she would hand me a heart and a loop, which I would string together.  She'd then hang them on a decorative white tree I have, or show me where to hang them.  She retained interest for about two thirds of the hearts!  (Some re-distribution did occur afterwards!)

Make easy watercolour hearts with your children as Valentine's crafting.  You can use them as hanging decorations on a Valentine's tree.

A pretty Valentine's tree was the result!

If your child is older they could be involved in more elements of the process.  Emily was happy with this, though, and proudly showed her Daddy the heart tree she made!

Do let me know if you give this a go - I'd love to see!


*affiliate link


Related Posts Plugin for WordPress, Blogger...