My main birthday present in December was an excitedly anticipated Cricut Joy. I have been enjoying using it, in the spare moments I get. It's difficult to find the time to really get stuck in, with an energetic toddler around, but I'm learning bits here and there!
You know when you have so many things that need to be done around the house... but you get some time to yourself and a (pretty unnecessary) task such as making memory labels somehow whizzes to the top of the priority list?! That's what happened here...
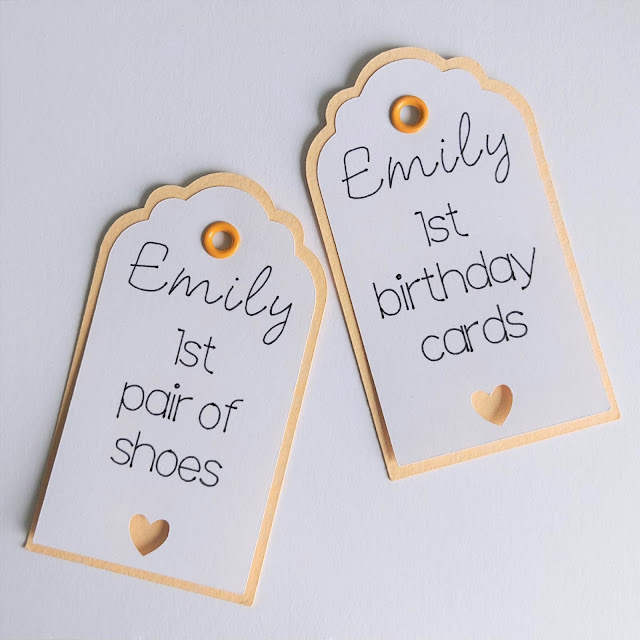
I started with a free tag shape in Cricut Design Space. I added text to that to have my daughter's name at the top, then the item I was tagging below that. The font I used for her name was P.S. The font I used for the description was Quinn Type. These are both free writing fonts within Design Space. When you make the tags, the Cricut Joy uses the pen to write the text, then you swap to a blade to cut the tag out.
I also added a small heart shape and used the slice tool to remove it from the tag, so that it would leave a heart shape hole when cut out. I cut this out from ordinary white cardstock, using a Cricut Standard Grip mat.
This is how the first layer of the tag came out. I then used the same free tag shape and made it slightly bigger so that it could sit behind this and would be seen around the edges and through the heart cut-out in the top layer. The second layer had no writing or heart cut-out, just the hole at the top, which needs to be in the same place as for the first layer. I cut that out of some coloured cardstock I had, using a Cricut Standard Grip mat.
I joined the two layers via the hole at the top, using a mini eyelet setter and an eyelet that matched the colour of the card I used for the second layer. I then threaded some bakers twine through the hole to attach the tags to items.
These could now be popped, nicely organised, into a memory box for my daughter!
I found this an immensely satisfying little project! I have the tags saved to be amended to use for other items in the future. This should help in keeping organised!
I hope you enjoyed this design, and I aim to bring more Cricut Joy creations to you in the future - it's great for organisational projects!


No comments:
Post a Comment