Monday 26 April 2021

What to do if your Cricut Joy Cards are Cutting too High

This isn't my usual "look what I made!" blog post... but I'm sharing it as I experienced this problem and I couldn't find anything online about it!

When I first got my Cricut Joy, I also got some Insert Cards and a Card Mat.  However, when attempting to make a card, I found that the whole design wasn't cutting centrally on the mat, it was cutting too high, and therefore the corner slits were cutting off the card!  One, this didn't look right; and two, it didn't function correctly - the top slits were unable to hold the insert rectangle of card.  You can see two examples below...

Cricut Joy Faulty Card Mat

You can also see on the Card Mat below, which still has the leftovers from the 'Thanks' card, that it is too high on the mat, and the top of the corner slits are being cut into the mat rather than the card...

Cricut Joy Faulty Card Mat

After searching high and low on the internet for some kind of solution to my problem - what was I doing wrong?! - I called the Cricut helpdesk.  They were so helpful, and after us trying a few different things while on the phone, it turned out...

...the Card Mat was faulty!!

This is something I didn't even consider!  The border at the top of the Card Mat was actually too big, so when the card was positioned correctly on the mat, it was actually lower than the Cricut Joy machine expected it to be.  The machine cut as it should, but because the card was lower down, it was cutting the design too high, and off the top of the card.

The Cricut helpdesk arranged for a new mat to be sent to me, and all was well with the world!

You can see the difference in the top border sizes below... the correct one is on top.

Cricut Joy Faulty Card Mat

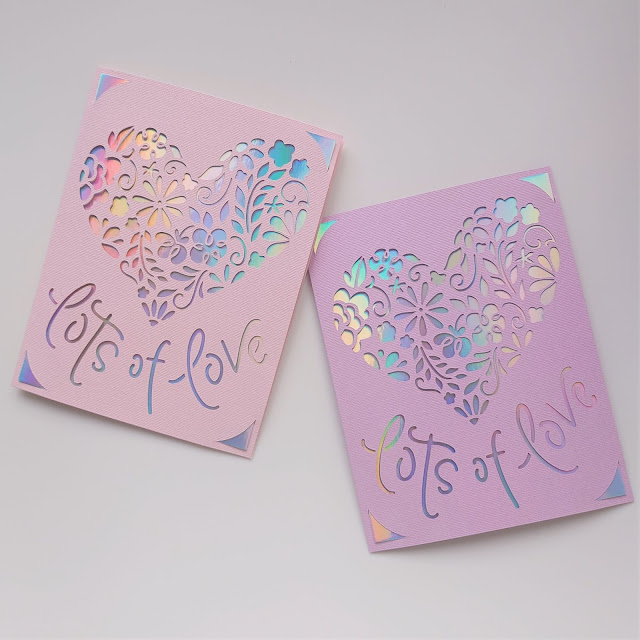
The new mat made all the difference, and I could now make the cards correctly!

Cricut Joy Card

Cricut Joy Card

I hope this helps anyone who experiences the same problem - as there must be a load of these faulty card mats out there!


Sunday 11 April 2021

Baby Boy V-Stitch Crochet Blanket

 I have finished the crochet blanket for my little boy bump!

A cute stripy crochet v-stitch baby boy blanket

This picture shows it in my little daughter's pink bedroom, as the nursery is yet to be painted for the new baby, and the cot is on order!  The baby's room will probably be bluey/aqua colours with accents of orange.

The yarn I've used is King Cole Cottonsoft DK in the below colours:

Azure (3366)
Opal (3460)
French Navy (741)
Orange (3030)
White (710) - not shown

You can buy this yarn from Love Crafts*.

A cute stripy crochet v-stitch baby boy blanket

I used this blanket as my starting point.  I started and ended with colour sections, though, rather than white sections, and I chose a different border.

  • I started with a chainless sc (US) foundation row of 149 stitches, plus 3 ch.  I would recommend doing a chain in this case, though, which would be 149 stitches, plus 3 = 152 ch.
  • I did four repeats of four colours (with white inbetween).  I have tight tension though, and for me the blanket was a bit thin.  So someone else might get away with three repeats.  Or else do more chains to make a wider blanket.  (Your starting chain must be a number that is divisible by 3, then plus 5.  For example, 152 ch is 49 x 3 = 147.  147 + 5 = 152.)
  • Each coloured band was 4 rows of v-stitch.
  • Each white band was 2 rows of v-stitch.
  • When finished, I went around the blanket with single crochet (US) / double crochet (UK) in white.  I did 2 stitches over the last stitch in each row of v-stitch down the sides.  Across the top and bottom, when I got to a v space, I did a long sc (US) / dc (UK) into it, to slightly mimic the zigzag of the v-stitch.
  • I did a row of sc, skip 2 st, ch 2.  I then did a row of sc, before continuing the border in linen stitch in white, ending with a single linen stitch row in orange.  You could probably just go straight into linen stitch after your initial foundation row of sc/dc, though.  (I was a bit undecided on what I was doing at first!)

A cute stripy crochet v-stitch baby boy blanket

I'm really pleased with how it came out, and how the colours look together!

A cute stripy crochet v-stitch baby boy blanket

The blanket measures approximately 78cm x 103cm. 

A cute stripy crochet v-stitch baby boy blanket

If the blanket looks a bit rumpled in the last two pictures, it's because a certain little toddler decided to play on it during the photoshoot!  At least it has her seal of approval - hopefully her brother will feel the same!

A cute stripy crochet v-stitch baby boy blanket


What do you think?  I hope you like it!


*affiliate link

Check out my completed crochet items here.

Like what you see?  Follow me on bloglovin!

Sunday 4 April 2021

Happy Easter!

 Just popping in quickly to say Happy Easter!

Colourful crochet and felt eggs on a pretty white Easter tree

Emily and I decorated this tree with eggs I'd made in previous years.

The very old felt eggs can be found on my blog here - in a post from nearly exactly 10 years ago!

Patterns for the crochet eggs can be found here and here.

Have a lovely time and eat lots of chocolatey goodies!


Friday 2 April 2021

Crochet Easter Bunnies

 I decided to make some little crochet bunnies for Emily to find during her Easter hunt this weekend.

Crochet these cute and easy Easter bunnies

The pattern I used was this one from The Knotted Nest.  I used DK scraps of King Cole Cottonsoft I had in stash, and a 4mm crochet hook.  (You can buy this yarn at Love Crafts *.)

Crochet these cute and easy Easter bunnies

You make a front and back, add a little tail, then crochet together with a bit of light stuffing inside.

Crochet these cute and easy Easter bunnies

The pattern calls for a pompom tail, but I couldn't make one that didn't look too big, despite all the trimming I did.  (I used a thinner yarn than the pattern suggested, and I am a tight crocheter too, so my bunnies came out smaller).

So instead I made the tail from this pattern by Love the Bluebird.  I used 2 strands of DK King Cole Cottonsoft in White, and a 5mm crochet hook.

I was going to make a lilac bunny too, but I lost interest after two!  I'm sure two are enough, though, and I hope Emily likes them!


*affiliate link

Check out my completed crochet items here.

Like what you see?  Follow me on bloglovin!

Related Posts Plugin for WordPress, Blogger...