Sunday 28 March 2021

Cute Easter Buckets with the Cricut Joy

I have been getting a fair bit of use out of my Cricut Joy - considering I have limited time to concentrate and learn what to do!

I'm quite excited by my latest project - some mini Easter Buckets for Emily to use for a little Easter egg hunt next weekend.

Make these cute and easy Easter buckets with the Cricut Joy!

Everything I've been doing so far has been with the things you can get free in Cricut Design Space (or fonts I've uploaded) but I decided to go for the free month trial of Cricut Access, and it has been good to not have to limit myself to the free things.  (To be honest, maybe some of what I've used here is free - I'm not sure now that I have access to it all.)

The bunny design I used without any changes, as I knew I wanted a simple white silhouette, and I love how it looks!  That was my original idea - a white bunny silhouette - but then I thought carrots would be cute too.  I found a simple carrot image, but it was also designed to be cut in one colour.  However, I fiddled about with the image to separate the leaves from the carrot so that I could cut them in two colours.  I'm so pleased with how they came out!

Carrot Image: #M7866023 (that one might be free) - tangerine and mint permanent vinyl (from the Beachside pack)
Bunny Image:
#M248BFFB9 - whie permanent vinyl

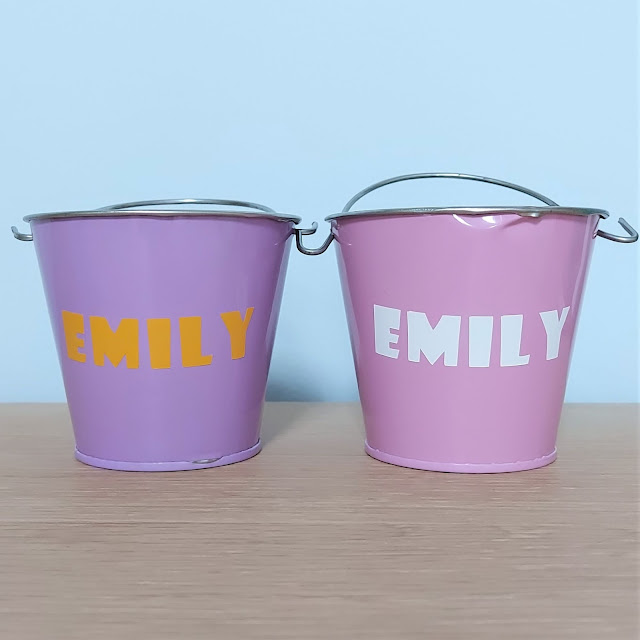
The back of the buckets have Emily's name on:

Make these cute and easy Easter buckets with the Cricut Joy!

(My camera really didn't like focussing on that orange!)  The font I used was Showcard Gothic.

The pastel buckets are from Baker Ross.  They are tiny 7.5cm high buckets, in a pack of 5.  Quite overpriced, once you pay for delivery, but they were just what I wanted.  And I hope that we'll use them for years to come.  (The dent on the back of the pink one annoys me greatly, though.  I may have to stick some trim on to cover it.)

Make these cute and easy Easter buckets with the Cricut Joy!

These are hollow chocolate eggs - creme egg sized - so you can see how small the buckets are!  My husband bought the eggs when he did the food shop.  I wanted smaller eggs, but the colourful foil wrappers are just what I had in mind!

I also made a couple that will be for the little baby on his way... if all goes to plan.

Make these cute and easy Easter buckets with the Cricut Joy!

Once he's safely in this world and we're sure of a name, I will put his name on the back of these buckets.

With the extra yellowy bucket, I did a simple 'Happy Easter' design.  Here they all are together!
Make these cute and easy Easter buckets with the Cricut Joy!

What do you think?  I'm so pleased - they came out just as I had imagined!


Saturday 20 March 2021

Craft Organising with the Cricut Joy

The tidying and organising of my craftroom is a very slow ongoing project.  I never seem to get enough time to work on it.  When I try with Emily, she ends up tipping ribbons and buttons all over the floor!  They are some of her favourite things to play with, so I don't mind... I just don't get much tidying done!

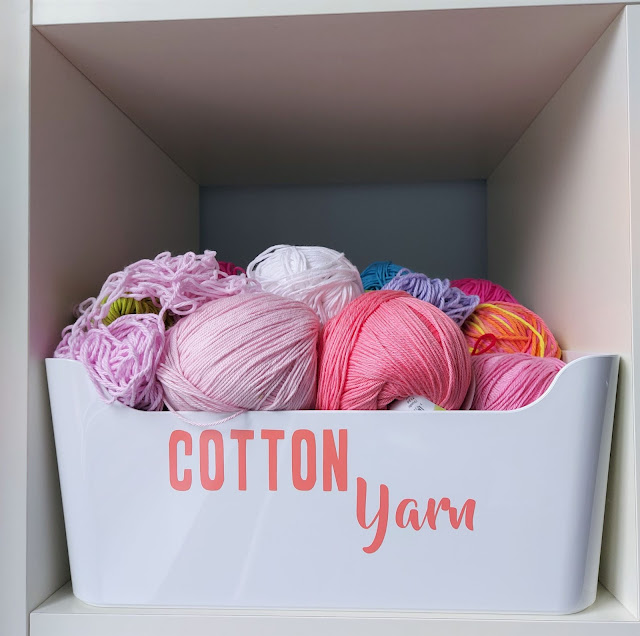
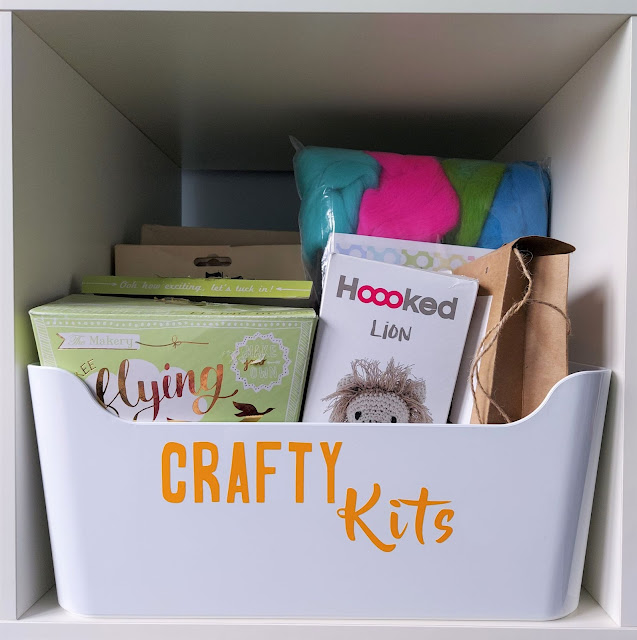
I have started organising a few thing into Ikea Variera tubs, though.  I've got a couple of tubs completed and I used my Cricut Joy to give them some fancy labels!

Organise your craft stash using the Cricut Joy to make pretty labels for storage tubs

I can't tell you how much pleasure this brings me!

Organise your craft stash using the Cricut Joy to make pretty labels for storage tubs

The fonts I used were the Cricut font, A Frightful Affair, for the first word, and a font I downloaded called Beyond the Mountains for the second word.  For the second word, I detached the letters and brought them a bit closer to each other.

I used Permanent Smart Vinyl from a pack called Beachside.  One is in the coral colourway, and one in tangerine.  I plan other colours for further boxes I will be labelling.  Hopefully at some point I can bring you some pictures of a fully tidy and organised craftroom!  But, for now, it's a start...!


Sunday 14 March 2021

Baby Boy Blanket Beginnings

 I am yet to share my exciting news here on my blog... so here it is!

See the start of a zingy crochet V-Stitch Baby Blanket

We're expecting our second child - a little boy due end of June / beginning of July!

I have naturally started work on a crochet blanket for the little one!  You can see the colours above - although the blue and aqua look quite similar in that image.  The next picture shows their colours better...

See the start of a zingy crochet V-Stitch Baby Blanket

The yarn I've used is King Cole Cottonsoft DK in the below colours:

Azure (3366)
Opal (3460)
French Navy (741)
Orange (3030)
White (710) - not shown

You can buy this yarn from Love Crafts*.

I decided to go for a v-stitch pattern... although I was a bit uncertain whether I'd made the right choice or not after I first started.

See the start of a zingy crochet V-Stitch Baby Blanket

I carried on to see all the colours in play, though, and decided I did like it!

See the start of a zingy crochet V-Stitch Baby Blanket

I really love the orange and opal (aqua/turqouise).

So far, so good!  I will be back at some point to share the finished blanket I hope!


*affiliate link

Check out my completed crochet items here.

Like what you see?  Follow me on bloglovin!

Saturday 6 March 2021

Crochet Pineapple Pattern

Back in 2017 I made this cute little pineapple.  I've had a few requests for the pattern... so will be bringing it to you today!

Make this cute and easy crochet pineapple with this FREE pattern!

I made up my own pattern, inspired by a lot of the crochet pineapple images on Pinterest.

Terms are in US (even though I'm from the UK!).  To convert this to UK, replace all dc stitches with tr.

Use a yellow yarn and a green yarn, and a hook size appropriate for your yarn and to keep the crochet nice and tight for stuffing.  I used Rico Creative Cotton Aran yarn that I had in stash.  You can buy this yarn from Love Crafts*.

YELLOW PINEAPPLE:

  • Magic ring
  • ch2 (counts as first dc), 11dc, join with sl st to ch2 (12 dc)
  • ch2 (counts as half of first dc2tog), dc into same st (to complete first dc2tog), dc2tog into each st, join with sl st to first dc (after the ch2) (12 dc2tog clusters)
  • ch2 (counts as first part of first dc3tog) dc2tog into same st (to complete first dc3tog), dc3tog into each st, join with sl st to dc2tog (12 dc3tog clusters)
  • ch2 (counts as first part of first dc3tog) dc2tog into same st (to complete first dc3tog), dc3tog into each st, join with sl st to dc2tog (12 dc3tog clusters)
  • ch2 (counts as first part of first dc3tog) dc2tog into same st (to complete first dc3tog), dc3tog into each st, join with sl st to dc2tog (12 dc3tog clusters)
  • Stuff the pineapple.
  • ch2 (counts as half of first dc2tog), dc into next st (to complete first dc2tog across 2 sts), dc2tog across 2sts around, join witih sl st to first dc (6 st)
  • Cut yarn


GREEN LEAVES:

(When I slip stitched into the yellow stitches to create the leaves, I did this by working my hook from the inside of the pineapple to the outside.  Rather than working as if I was continuing the rounds of the pineapple, by working my hook from the outside of the pineapple to the inside.  I’m sure the leaves would look fine either way – it just meant that the top of the leaves were the right side, although they stick up on the air anyway.)

  • Join green yarn with a sl st to any of the 6 sts in the last round of the yellow, ch7, sl st into 2nd ch from hook and into all stitches down
  • sl st into next st, ch7, sl st into 2nd ch from hook and into all stitches down
  • sl st into next st, ch7, sl st into 2nd ch from hook and into all stitches down
  • sl st into next st, ch7, sl st into 2nd ch from hook and into all stitches down
  • sl st into next st, ch7, sl st into 2nd ch from hook and into all stitches down
  • sl st into next st, ch7, sl st into 2nd ch from hook and into all stitches down
  • sl st into first st again (you will be going around the 6 stitches again to create another layer of leaves), ch7, sl st into 2nd ch from hook and into all stitches down
  • sl st into next st, ch7, sl st into 2nd ch from hook and into all stitches down
  • sl st into next st, ch7, sl st into 2nd ch from hook and into all stitches down
  • sl st into next st, ch7, sl st into 2nd ch from hook and into all stitches down
  • sl st into next st, ch7, sl st into 2nd ch from hook and into all stitches down
  • sl st into next st, ch7, sl st into 2nd ch from hook and into all stitches down
  • sl st somewhere to finish and cut yarn

This should give you 12 leaves, two layers of 6, but they should all wriggle about into a nice cluster of leafiness!


Sew ends in the best way to neaten the top and create a loop if you'd like one.  Your pineapple is made!


Make this cute and easy crochet pineapple with this FREE pattern!

Do let me know if you make one of these - I'd love to see your creations!

Make this cute and easy crochet pineapple with this FREE pattern!

*affiliate link


Check out my other crochet items here.


Like what you see?  Follow me on bloglovin!


Related Posts Plugin for WordPress, Blogger...